Main Page
LoRa RMM v3.0
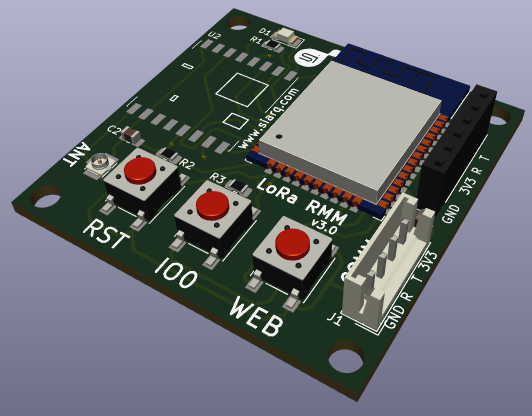
Board
Connectors
Plastic Box Wall Connectors
SMA
868MHz Antenna plugged at SMA wall connector. To avoid malfunctions, it is important to connect antenna before power LoRa RMM v3.0 device up.
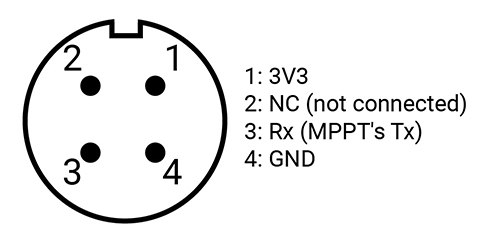
4 pin connector
1- 3V3
2- NC (not connected)
3- Rx (MPPT's Tx)
4- GND
Wall Connector View:
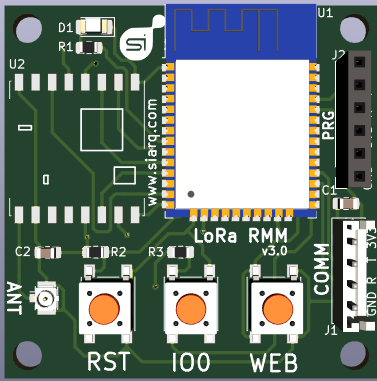
PCB Connectors
ANT
uFL connector. SMA / uFL antenna pigtail is connected on ANT.
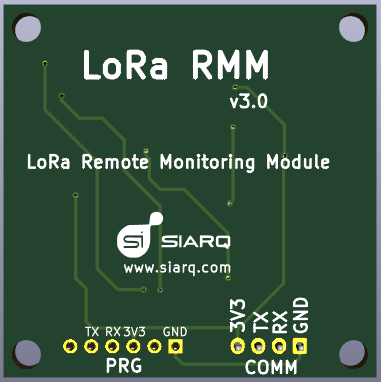
PRG
J2: Firmware programming connector. Also, it can be used for debugging.
To avoid power supply issues, it is suggested powering device only by COMM connector (J1).
COMM
J1: It is connected to 4 pin external connector.
GND: BLACK
RX:  RED    <- Be careful!
Tx:  WHITE  <-- Not Connected
3V3: YELLOW <- Be careful!
Modes
Firmware Programing
Button sequence:
1- Pressing RST button
2- Pressing IO0 button
3- Releasing RST button
4- Releasing IO0 button
Firmware programming requires a 3V3 UART board attached at PRG connector:
Setting LoRa Keys
Spreadsheet with current TTN keys
Registering device at TheThingsNetwork backend
Using LoRa's Setting Tool
Button sequence to load LoRa keys in LoRa RMM v3.0 device:
1- Pressing RST button
2- Pressing WEB button
3- Releasing RST button
4- Releasing WEB button
LED is flashing while looking for WiFi and requesting IP from DHCP server. When it has got an IP, LED remains during 1 second on.
Access Point SSID: iotcat
Access Point Password: 1234567890a
Access Point should have Internet connection without Captive Portal.
After button sequence, open LoRa's Setting Tool:
5- Clicking on Accept MAC button. Then, message Press IO0 button is shown.
6- Pressing once IO0 LoRa RMM v3.0 button. Then, MAC is shown at Accept MAC button.
7- Connection with device can be tested pressing Test ON (it lits LED on) and Test OFF (it lits LED off).
8- Press Read button to read current keys in LoRa RMM v3.0 device (a lot of F means it is first time uploading LoRa keys).
9- Copy keys from The Things Network backend and paste on LoRa's Setting Tool. (Device Address, Network Session Key and App Session Key)
10- Set Spread Factor (ranging from 7 to 12) and Deep Sleep in minutes.
11- Press Send to upload LoRa RMM v3.0 device values.
12- Press Clear to clear values on web and press Read to verify new values have been uploaded.
Normal Mode
There is not button sequence. It is by default mode when powering LoRa RMM up. Coming from other modes, normal mode can be reached pressing RST button.
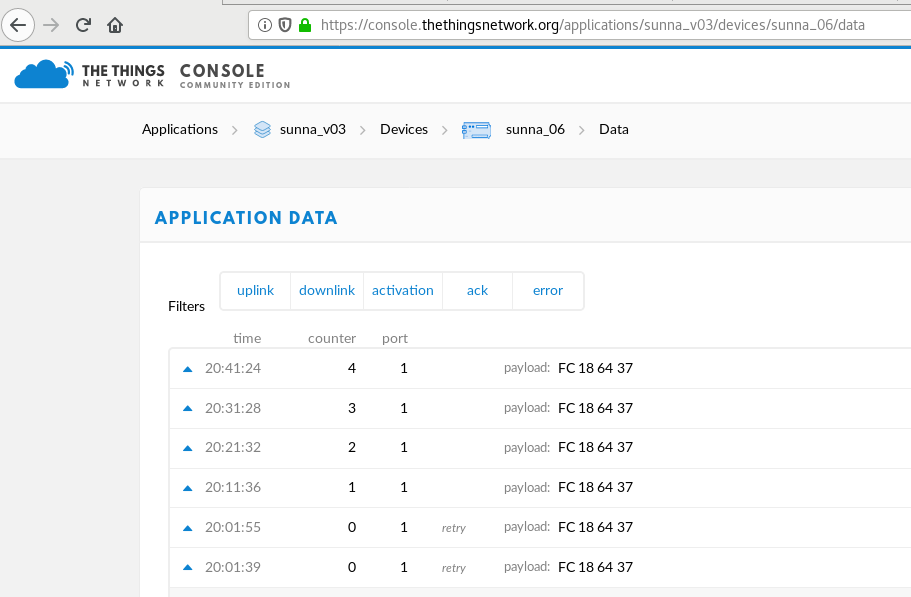
Testing TTN (The Things Network) keys have been uploaded properly:
In above video, after powering device up, RST has been pressed again to test it was working as expected.
It has been programmed to wake up every 10 minutes:
Troubleshooting
Flashing continuously
Normal Mode
LoRa RMM device has not TTN keys loaded.
Reason: Because it is first time using it.
How to solve it?: Uploading TTN keys to LoRa RMM device.
Setting LoRa Keys
Check if any other device (like a mobile phone) is able to connect to an Access Point with these settings:
Access Point SSID: iotcat
Access Point Password: 1234567890a
Reset and try it again.
